Some of the links in this article may be affiliate links. If you make a purchase through these links, we may earn a small commission at no extra cost to you. Thank you.
Building a small pond takes one to two weekends and costs between $500 and $1,500 in materials for a basic DIY setup. You need a flexible pond liner, a submersible pump, geotextile underlayment, and border stones. Choose a spot with four to six hours of daily sunlight, dig at least 18 inches deep, and you can have a wildlife-filled water feature ready for plants and fish within four to six weeks.
- The average DIY small pond costs $500–$1,500 in materials; professional installation averages $7,400 nationally (HomeAdvisor, 2026)
- A well-maintained backyard pond can increase property value by up to 7.7% and help a home sell up to 20% faster
- 65% of professional pond builders use 45-mil EPDM rubber liner for its durability and fish-safe properties
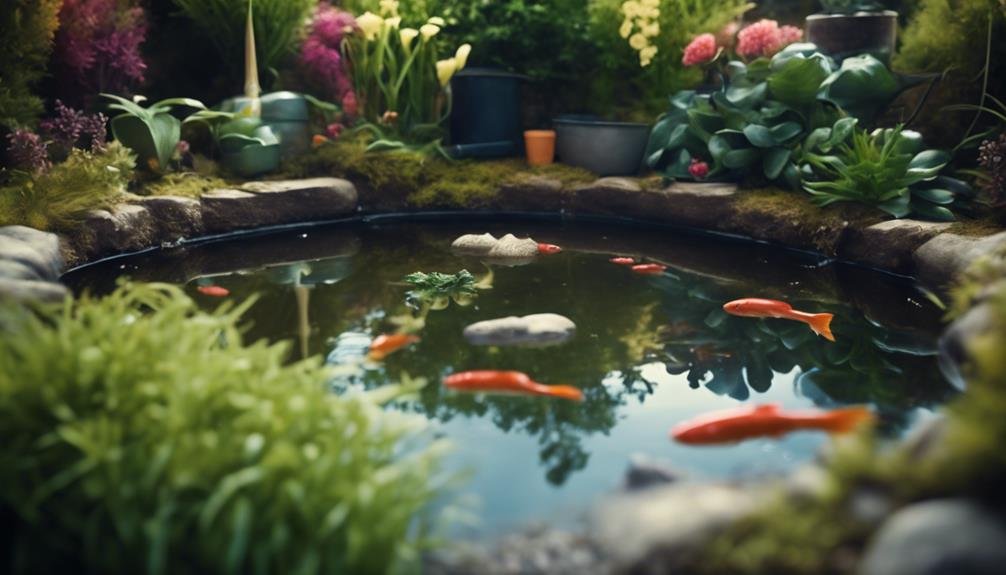
- A 6×8-foot pond supports four to six small fish and a full planting scheme of marginal, oxygenating, and floating plants
Why should you build a small pond in your backyard?
Pond installations have surged by 34% since 2022, making water features the fastest-growing outdoor living trend, according to the National Association of Landscape Professionals. A small garden pond delivers returns that go far beyond looks.
A well-designed pond can increase property value by 1.9% to 7.7%, with some appraisers reporting gains of up to 15% for premium water features. Homes with ponds also spend up to 20% fewer days on the market, making them easier to sell in competitive markets. According to data from LandInvestor.com, pond acreage alone increases bare land values by an average of 6%.
Wildlife benefits are just as tangible. A new pond can attract frogs within weeks and support dragonflies, birds, and hedgehogs within a single season. Ponds are among the most productive habitats any gardener can create — a single 4×6-foot water feature can support hundreds of invertebrate species. According to the Royal Horticultural Society, ponds are the single most effective habitat addition any garden owner can make for local biodiversity.
The personal benefits are real too. Research consistently links exposure to moving water with reduced cortisol levels and improved mood. A backyard pond gives you that benefit without leaving home. For families with young children, a shallow wildlife pond gives them a nature space they can explore all year.
How big should your small pond be?
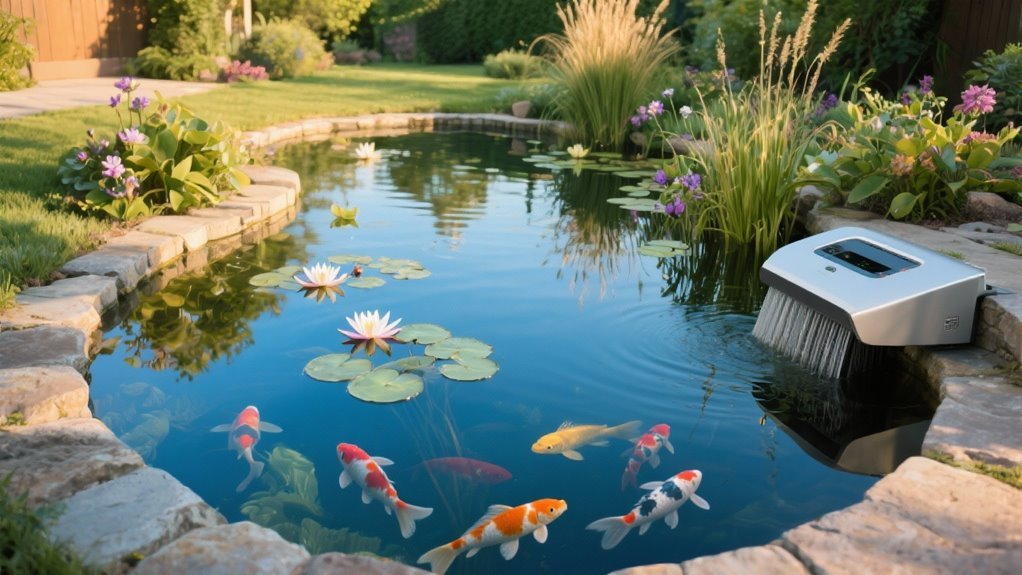
The minimum workable surface area for a garden pond is around 4×4 feet (1.2×1.2 meters). Anything smaller warms up too quickly in summer, loses oxygen, and struggles to support stable water chemistry. Most beginners find that a 6×8-foot footprint hits the sweet spot — big enough to look natural and support fish, small enough to build and maintain without heavy equipment.
Depth matters as much as surface area. The Royal Horticultural Society recommends a minimum depth of 30 inches (75 cm) for the widest range of pond plants. For a simple wildlife pond with no fish, 18 to 20 inches is adequate in mild climates. Fish ponds should be at least 24 inches deep, with a zone reaching 30 to 36 inches to allow fish to overwinter safely and retreat from summer heat.
When calculating your liner size, use this formula: add twice the maximum depth plus two feet of overlap to both the length and the width. For example, a 6×8-foot pond with a 2-foot depth needs a liner measuring approximately 12×14 feet. According to a 2026 survey from Living Water Aeration, 60% of DIY pond builders now use an online liner calculator to size accurately before purchasing materials.
| Pond size | Volume (approx.) | Fish capacity | Typical DIY material cost |
|---|---|---|---|
| 4×4 ft, 18-in deep | ~270 gallons | Wildlife only / 1–2 small fish | $350–$600 |
| 6×8 ft, 24-in deep | ~540 gallons | 4–6 goldfish | $700–$1,200 |
| 8×10 ft, 30-in deep | ~1,100 gallons | 8–12 goldfish or 2–3 koi | $1,200–$2,500 |
| 10×12 ft, 36-in deep | ~2,000 gallons | Small koi pond | $2,500–$5,000 |
What materials do you need to build a small pond?
Getting your materials list right before you dig saves time and money. Here is everything a typical 6×8-foot small pond requires, along with approximate costs for 2026.
Essential materials
- 45-mil EPDM rubber pond liner — the industry standard, used in 65% of professional pond installations in 2026. EPDM is fish-safe, UV-resistant, and flexible enough to conform to any shape. Budget $0.50–$1.50 per square foot.
- Non-woven geotextile underlayment — a protective layer between soil and liner that prevents stones and roots from puncturing the rubber. Costs approximately $0.15–$0.30 per square foot.
- Submersible pond pump — must circulate the pond’s full volume every one to two hours. For a 540-gallon pond, choose a pump rated at 540–1,080 GPH minimum.
- Biological and mechanical pond filter — removes fish waste, ammonia, and debris to keep water clear and fish healthy. Budget $100–$400 depending on pond volume.
- Edging materials — natural stone, slate, timber sleepers, or cobbles to secure liner edges and create a natural finish. Budget $100–$400 for a 6×8-foot pond perimeter.
- Builder’s sand — 2–3 inches spread across the base and walls before the underlayment goes down. Smooths irregularities and cushions the liner.
- Pond dechlorinator — essential for treating tap water before adding any plants or fish. Chlorine and chloramine in municipal supplies damage gills and kill beneficial bacteria.
- Freshwater test kit — for monitoring ammonia, nitrite, nitrate, and pH during the cycling period and ongoing maintenance.
Recommended products
For the liner, a quality 45-mil EPDM rubber sheet is the safest and most durable option for a small backyard pond:

- This 45 mil liner is the number one pond grade thickness on the market, unlike others who choose to install with a thinner 34.5 mil.
- This material is easy to cut if excess is left behind after installation is complete ensuring a clean look and design to your pond.
- The flexible and UV protectant layer ensures that the liner is made to withstand cold and warm temperatures while creating longevity.
- This liner is pond ready and is safe to use with fish, plants, and other aquatic life
- Puncture resistant material helps to ensure that pebbles and other small materials do not easily go through the liner
A reliable submersible pump with adjustable flow keeps the pond oxygenated and drives your filter system:

- Powerful Pump & Compact Size: The BARST pond pump features a 460W motor for powerful, high lift, and energy savings. Maximum flow rate: 5300GPH. Maximum lift height: 18.37ft. Dimensions: 11.51 x 5.87 x 8.55 inches
- Free Barrier Bag: The BARST swimming pool pump is equipped with a barrier bag that prevents large debris or fish from being sucked into the submersible pump, protecting it from damage and reducing maintenance.
- Easy Installation: The BARST waterfall pump is equipped with a 25 feet UL certified cable and a US 3-pin plug, which can meet your different needs (supporting land use or immersion in water). It also includes 3 hose adapters with diameters of 0.75 inches, 1.01 inches, and 1.97 inches
- Energy Saving & Quiet Pond Pump: High quality ceramic shaft bearings and excellent rotor design achieve energy savings while maintaining high output. Suitable for freshwater and seawater. Resin sealing effectively blocks current and has a long service life. The 4 rubber feet can prevent noise and vibration during use.
- Multi Functional Pump: BARST submersible pump can be used as a water feature pumps, koi pool pumps, garden waterfall pumps, fountain pumps, hydroponic pumps, irrigation system pumps, and aquarium pumps
How do you choose the right location for your small pond?
Location is the single biggest factor in whether a small pond thrives or becomes a maintenance headache. Get this right before you lift a single spade of soil, and every step that follows becomes easier.
Sunlight: Aim for a spot that receives four to six hours of direct sunlight per day. Full shade causes excessive algae growth from decaying organic matter and limits the plants you can grow. Full sun all day overheats small ponds rapidly in summer, stressing fish and driving algae blooms. A south- or east-facing open position with afternoon dappled shade is close to ideal for most climates.
Distance from trees: Avoid placing a pond directly beneath deciduous trees. Autumn leaf fall and spring pollen continuously pollute the water, consuming oxygen as they decompose and clogging your pump filter on a weekly basis during peak seasons. Position the pond at least 10 feet from the nearest large deciduous tree as a practical minimum.
Power access: Your pump needs a permanent, weatherproof electrical connection via a ground fault circuit interrupter (GFCI) outdoor outlet. Aim for an outlet within 10 to 15 feet of the pond to keep cable runs manageable and eliminate trip hazards. Never rely on extension leads as a long-term power solution for outdoor pumps.
Underground services: Always call 811 (in the United States) or your national utilities notification service before digging. Hitting a buried gas pipe, electrical cable, or water main is dangerous and expensive. The call is free, and marker flags are typically placed within two business days.
How do you excavate and shape your pond?
Excavation is the most physically demanding part of building a small pond, but it is entirely manageable as a weekend project for a 6×8-foot design. A systematic approach prevents costly re-digging and ensures a level, stable finished pond. Follow these steps in order.
- Mark the outline. Use a garden hose, rope, or marking spray to define your pond shape on the ground. Kidney and irregular organic shapes look far more natural than strict rectangles once plants are established.
- Remove turf. Cut and lift sod within the marked area. Stack it grass-side down in a corner of the garden to decompose into useful topsoil over several months.
- Dig your marginal shelf first. Excavate the outer perimeter to a depth of 10–12 inches. This shelf will hold potted marginal plants at the right depth and provide a gradual slope for frogs, birds, and hedgehogs to enter and exit the pond safely.
- Excavate the main body. Continue deeper in the central area to your target depth of 24–30 inches. Remove all stones, sharp flints, broken glass, and tree roots that could puncture the liner from below.
- Check your level. Lay a long plank across the pond rim and use a spirit level at multiple points around the perimeter. An unlevel pond exposes liner on one side while overflowing on the other. Fill any low spots with firmed, compacted soil.
- Compact and smooth the walls. Tamp down the base and sloped sides by hand or with a tamper. A smooth surface significantly extends liner life by eliminating sharp pressure points.
- Add a sand base. Spread 2–3 inches of damp builder’s sand evenly across the base and gently sloped walls of the main basin. This cushions the liner and fills any remaining surface irregularities before underlayment goes down.
For a 6×8-foot pond you will excavate approximately four to five cubic yards of soil — roughly 20 to 25 standard wheelbarrow loads. Plan where the spoil will go before you start. It makes excellent fill for a raised vegetable bed or can be used to build a gentle garden berm that screens the pond and adds visual interest.
How do you install a pond liner correctly?
Liner installation is the most technically critical step in building a small pond. A correctly installed liner lasts 20 to 30 years. A poorly installed one develops folds, stress points, and leaks within a few seasons. This step determines how long your pond lasts.
- Lay your underlayment. Drape the geotextile fleece over the entire excavation, pressing it gently into the marginal shelf and the base. Trim to leave 12 inches of overlap at the rim all the way around. This layer protects against stones working upward through the soil over time.
- Unfold the liner on a warm day. EPDM liner is significantly more flexible and easier to work with at warm temperatures. Unfold the liner and drape it centrally over the hole. Work from the center outward, pressing it gently into the base and shelves without stretching the material.
- Fold the corners neatly. Pleat the liner at each corner as you would fold a fitted sheet — create flat, neat pleats rather than bunched folds. Secure temporary pleats with smooth, heavy stones placed just inside the rim. Never use sharp-edged rocks that could stress or cut the liner.
- Begin filling slowly. Start filling with a garden hose at a slow rate. As the water weight builds, the liner will pull inward and conform naturally to your excavation shape. Adjust perimeter pleats as the water rises to keep folds flat.
- Pause at the marginal shelf level. Check that the liner is sitting smoothly across the base and shelves before continuing. Large bunched folds left at this stage will never disappear and can create weak points under pressure.
- Trim the liner edge. Once the pond is about two-thirds full and the liner has settled, trim excess liner at the rim — leave a minimum 12-inch overlap flap all around the perimeter.
- Secure the liner edges. Fold the liner flap flat against the ground and weight it under your edging stones, turf, or timber sleepers. The edging locks the liner permanently in place and conceals the black rubber for a natural finish.
- Complete filling and treat the water. Fill to your desired level — typically 2 to 3 inches below the pond rim. Add pond dechlorinator immediately to neutralize chlorine and chloramine before adding any plants or fish.
“The most common liner installation mistake is pulling it tight across the excavation before filling. Always work with slack — the water weight does the contouring work for you. A liner installed patiently, with loose folds, will outlast one rushed into position by decades.”
— Installation guidance from Aquascape Inc., North America’s largest pond design and installation company (2026)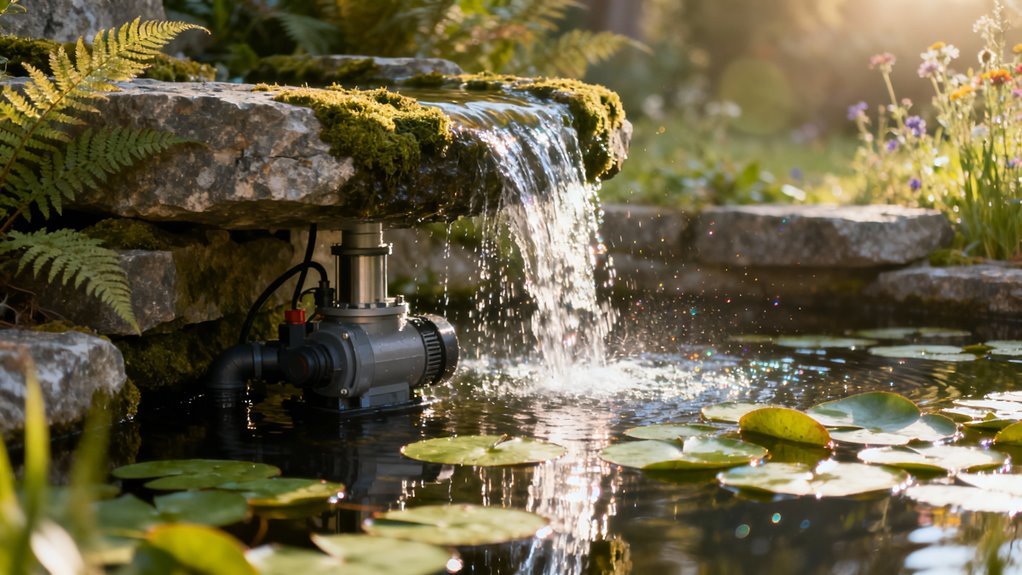
What pump and filter does a small pond need?
Every pond with fish needs both a pump and a biological filter. Even a wildlife pond benefits from a pump to oxygenate the water and prevent stagnant conditions. Getting the sizing right is straightforward once you know your pond volume in gallons.
Pump sizing rule: Select a pump capable of turning over your pond’s full volume every one to two hours. A 540-gallon pond needs a pump rated at a minimum of 540 GPH, though 800 to 1,000 GPH gives useful headroom for head pressure losses through filter tubing and any waterfall height. Most quality small pond pumps cost $50–$200 and are rated for continuous submersible use. Look for an adjustable flow dial so you can reduce output in winter when fish are less active.
Filter types: A biological filter grows colonies of beneficial bacteria that convert harmful ammonia (produced by fish waste) into less harmful nitrate. A mechanical filter physically strains debris — uneaten food, leaves, algae — out of the water before it can decompose. Most small pond owners use an all-in-one external box filter positioned outside the pond: it connects to the pump via tubing and can be cleaned without disturbing the water. Budget $100 to $400 for a quality unit rated to your pond’s volume.
Placement tips: Position the submersible pump at the deepest point of the pond, raised 2 to 3 inches off the base on a small brick to prevent it from drawing in fine silt. Run the outlet tubing to your filter or waterfall feature and conceal the hose under edging stones for a tidy finish. The filter’s clean outlet should ideally return water at the opposite end of the pond from the pump intake to maximize circulation.
How do you add plants to a small pond?
Plants are what keep a small pond healthy. Aim to cover 50 to 70% of the water surface with plant growth by the end of your first summer. This shading suppresses algae and provides the oxygen and cover wildlife depends on.
Plants fall into three distinct zones. Marginal plants grow in the shallows at 4 to 12 inches depth: yellow iris, marsh marigold, pickerel weed, and water mint all thrive at this level and provide vertical structure at the pond edge. Submerged oxygenators grow fully underwater and are the primary oxygen producers: hornwort, curly-leaved pondweed, and water milfoil are reliably hardy choices for small ponds. Surface floaters provide essential shade: water lilies anchor in pots at 18 to 24 inches of depth and spread their leaves across the surface, while water hyacinth floats freely and absorbs excess nutrients with exceptional efficiency.
Plant all aquatic species in open-mesh aquatic baskets lined with hessian and filled with low-nutrient aquatic planting compost — never use general garden compost, which immediately pollutes the water with excess nutrients and triggers algae blooms. Place marginal baskets directly on the pond shelves at the correct depth, and lower oxygenators and lilies to the base or onto a supporting brick stack at the appropriate level.
“Resist the temptation to underplant in year one. An underplanted pond is an algae pond. Stack your marginal shelves generously from day one — you can divide and reduce plants in year two once the ecosystem has found its balance.”
— Royal Horticultural Society (RHS), Pond construction and planting guidelines (2026 edition)How do you add fish to a small pond safely?
Adding fish too soon is the single most common cause of pond failure among beginners. Fish produce ammonia, and a new pond has zero biological filtration capacity at this stage. The nitrogen cycle — during which beneficial bacteria establish in the filter and on surfaces throughout the pond — takes four to six weeks in a newly filled system. Introducing fish before this cycle completes is almost always fatal.
📋 Case study: suburban Michigan pond build (Spring 2024)
A homeowner in suburban Michigan built a 6×8-foot pond using a DIY liner kit costing $720 in materials. She planted 12 marginal plants and two water lilies in week one and waited six full weeks before adding any fish. After a freshwater test confirmed zero ammonia, zero nitrite, and stable pH of 7.2, she introduced six common goldfish sourced from a reputable local aquatics retailer.
Results at 12 weeks: Four native frog species had colonized the pond voluntarily. Mosquito pressure in the surrounding garden had noticeably decreased. A real estate appraiser, consulted when the property was listed three months later, noted the pond as a contributing factor in a valuation $8,500 above comparable neighboring properties. The home sold at full asking price within 11 days — and the buyer specifically cited the pond as a deciding factor.
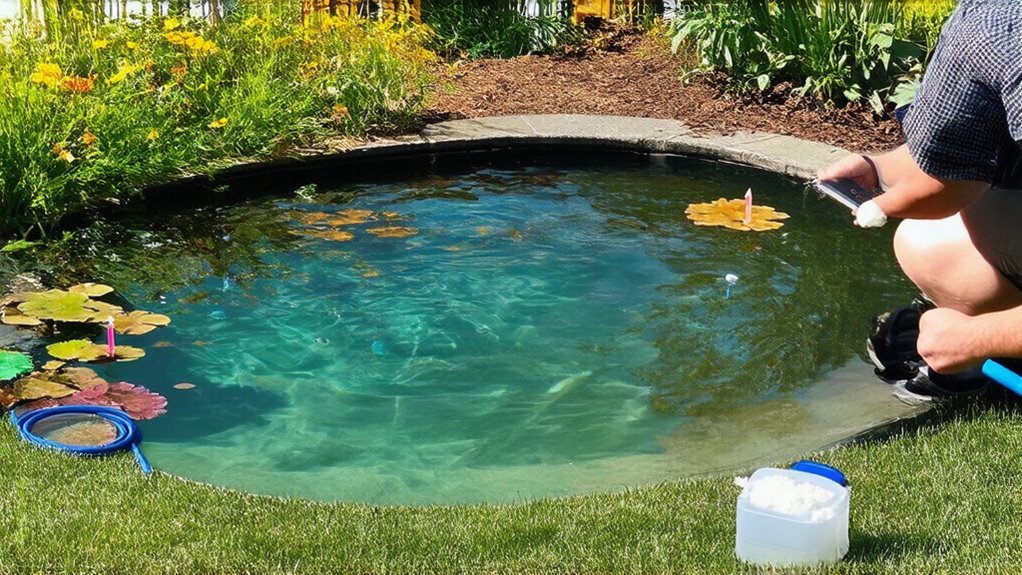
Before introducing fish, use a freshwater test kit to confirm that ammonia reads zero, nitrite reads zero, and pH sits between 6.5 and 8.0. Begin with just two or three hardy, forgiving species — common goldfish and shubunkin are excellent first choices for small ponds. Observe them for two full weeks before adding more fish.
Follow the stocking rule of one inch of adult fish body length per ten gallons of pond water. A 540-gallon pond can comfortably support 54 inches of fish at maturity — roughly eight to ten average-sized goldfish. Overstocking is the leading cause of water quality crashes in established small ponds, so stock conservatively and resist the urge to add fish quickly.
When you bring fish home, float the sealed bag in the pond water for 15 minutes before opening it. This equalizes the water temperatures and prevents thermal shock, which can be fatal even in otherwise healthy fish. Use a net to transfer fish from the bag to the pond. Never tip the dealer’s water into your pond — it may carry pathogens.
How do you maintain a small pond year-round?
A well-designed small pond requires far less maintenance than most beginners expect — typically two to four hours per month during the active season, dropping to near zero in the depths of winter. Work with the seasons and most of the maintenance looks after itself.
Spring (March–May)
Remove any pond net used during winter. Clean the pump and filter thoroughly — rinse filter media in a bucket of pond water, never tap water, to preserve the beneficial bacteria living in it. Divide and repot marginal plants that have outgrown their baskets. Begin feeding fish once water temperatures consistently exceed 50°F (10°C). Top up the water level with dechlorinated water after winter losses to evaporation and ice formation.
Summer (June–August)
Top up water levels weekly during hot weather — a 6×8-foot pond can lose several inches to evaporation during a summer heat spell. Test water quality monthly. Remove blanketweed manually by twisting it out with a cane or brush. Resist the urge to drain and fully clean the pond: partial water changes of 10 to 15% are far safer than complete cleans, which destroy beneficial bacterial colonies and trigger ammonia spikes. Feed fish once or twice daily, removing any uneaten food after five minutes.
Autumn (September–November)
Stretch a fine-mesh pond net over the surface before deciduous trees begin to drop their leaves. Remove and compost dead plant material before it can sink and decompose in the water. Cut back marginal plants to 4 to 6 inches above the waterline. Stop feeding fish once water temperatures drop consistently below 50°F — fish metabolism slows dramatically in cold water and undigested food causes serious health issues. Move tender floating plants such as water hyacinth indoors before the first frost.
Winter (December–February)
Never allow your pond to freeze over completely for extended periods. Decomposing organic matter beneath a sealed ice lid produces toxic gases — primarily methane and hydrogen sulphide — that can asphyxiate fish within days. Float a dedicated pond de-icer ($30–$80) or even a rubber ball to maintain an air hole. Never smash ice with force; the shockwaves stress and injure fish. In very cold climates, move the pump to a shallower position to avoid circulating the coldest deep water layer, which fish need for overwintering torpor.
What common small pond mistakes should you avoid?
Even experienced gardeners make these errors on their first pond build. Knowing what to avoid saves time and money.
- Building it too small. A pond under 4×4 feet fluctuates in temperature and water chemistry far too rapidly to stay stable. If in doubt, add 20% to your planned dimensions. You will never regret a larger pond.
- Skipping the underlayment. A liner laid directly on soil will be punctured by stones and roots working upward within two to three years. Underlayment costs pennies per square foot and protects a 20-year liner investment.
- Undersized filtration. A filter rated for 200 gallons cannot keep a 500-gallon fish pond clean. Always match or slightly exceed your pond volume when specifying a filter unit.
- Adding fish in the first two weeks. The pond has near-zero biological filtration at this stage. Ammonia from even two goldfish can reach lethal concentrations within 48 hours in an uncycled pond.
- Choosing a fully shaded location. Shade kills aquatic plants, and without plants your pond depends entirely on mechanical filtration for water quality. Even a wildlife pond needs a minimum of four hours of daily sunlight.
- Overstocking with fish. More fish equals more waste and a heavier filter load. Stock conservatively. You can always add more fish later, but removing them is stressful.
- Forgetting to dechlorinate top-up water. Every time you top up a pond with tap water you add chlorine and chloramine that damage beneficial bacteria and irritate fish gills. Keep a bottle of dechlorinator by the outside tap as a permanent reminder.
“The two biggest beginner mistakes are building a pond too small and not waiting long enough before adding fish. A larger pond with patient stocking is almost always a healthy pond. A tiny pond with fish added in week one is almost always a crisis within the month.”
— Greg Wittstock, founder of Aquascape Inc. and author of The Pond Guy series, speaking at the 2024 Pond-Scape ExpoWhat does the future of small pond building look like in 2026–2027?
The pond-building market is moving fast, pushed by new technology and a growing interest in rewilding gardens. Three trends are shaping what small pond builds will look like over the next two years.
Smart pond monitors are entering the mainstream. IoT-connected water quality sensors now cost as little as $80 to $150 and deliver real-time pH, temperature, ammonia, and dissolved oxygen readings directly to a smartphone app. For fish keepers, this technology removes guesswork and allows early intervention before water quality crashes.
No-dig pre-formed pond shells are growing in popularity among urban gardeners with paved or tiled outdoor spaces. Rigid polyethylene shells sit partially above ground, require no excavation, and can be installed in a single afternoon. They have less design flexibility than liner-built ponds but work well as a first pond for urban gardeners who might not otherwise have started.
Biodiversity regulations are beginning to influence residential pond design in the UK and Europe, where biodiversity net gain requirements are creating measurable demand for wildlife-focused pond creation. This regulatory momentum — and the design thinking it is generating around native planting and refuge habitat — is widely expected to reach North American markets by 2027.
Frequently asked questions about building a small pond
How long does it take to build a small pond?
A 6×8-foot backyard pond can be excavated, lined, and filled in a single weekend — typically 8 to 12 hours of active work spread across two days. Allow an additional few days for edging, planting, and tidying. Then wait four to six weeks for the pond to cycle fully before adding fish. Total elapsed time from first dig to first fish: approximately six weeks.
Do I need planning permission to build a garden pond?
In most US jurisdictions, a backyard pond under 1,000 square feet does not require a building permit, but rules vary significantly by county and municipality. Always call your local planning department before excavating. In the UK, small garden ponds are generally permitted development for residential properties. If your property is in a flood zone, has protected tree coverage, or is within a conservation area, additional restrictions may apply.
How deep should a small pond be for fish?
Fish ponds should have a minimum depth of 24 inches (60 cm), with at least one deeper zone reaching 30 to 36 inches where fish can shelter from summer heat and overwinter safely in cold climates. Wildlife-only ponds can function well at 18 inches in mild regions, though 24 inches gives better temperature and chemistry stability throughout the year.
What size pump do I need for a small pond?
Calculate your pond volume in gallons (length × width × average depth in feet × 7.48), then select a pump with a GPH rating equal to or greater than that number. For a 540-gallon pond, choose a pump rated at 540–1,080 GPH. Add at least 20% headroom to account for head pressure losses through filter tubing and any waterfall elevation.
Can I build a pond without a liner?
It is technically possible to build a pond in dense heavy clay soil by puddling — working the clay wet to create a watertight seal. In practice, this technique is unreliable in most garden soils, prone to cracking during dry spells, and requires considerable skill. For the vast majority of DIY pond builds, a quality 45-mil EPDM liner is the practical, reliable choice.
How do I stop algae taking over my small pond?
Dense planting is the most effective long-term solution — aim to cover 50 to 70% of the water surface with floating leaves and grow plenty of submerged oxygenators. Avoid overfeeding fish, as uneaten food decomposes into the nutrients algae thrives on. A UV clarifier fitted to the pump outflow is highly effective for suspended green-water algae and typically clears a new pond within one to two weeks of installation.
When can I add fish after building a new pond?
Wait a minimum of four to six weeks after filling before adding any fish. Test the water first — ammonia and nitrite must both read zero, and pH should be stable between 6.5 and 8.0. Introducing fish to an uncycled pond is the most reliably preventable cause of fish death in new ponds, and patience here is the best investment you can make.
Your small pond build: a six-week timeline
Build it right and a small pond repays the effort for decades. A weekend of digging and lining creates a habitat that attracts wildlife, gains character with every season, and adds real value to your property.
| Timeframe | Tasks |
|---|---|
| Week 1 | Plan pond size and shape; calculate liner dimensions; call 811; source and order all materials |
| Days 7–10 | Mark the outline; excavate in stages; check level at rim; compact base; add sand layer |
| Day 11–12 | Lay underlayment; drape and settle EPDM liner; fill slowly; add dechlorinator; install edging stones |
| Week 2–3 | Install pump and filter; add marginal plants and oxygenators; add water lily; monitor clarity |
| Weeks 3–6 | Allow the nitrogen cycle to establish; test water weekly; remove blanketweed by hand as needed |
| Week 6+ | Confirm zero ammonia and nitrite; introduce 2–3 hardy fish; enjoy and monitor |
Follow the steps, wait out the cycling period, and by the end of your first season you will have a pond that largely looks after itself.