Digging a pond transforms an ordinary backyard into a living ecosystem — one that attracts wildlife within days, reduces stress measurably, and adds genuine kerb appeal to your property. The process is more straightforward than most people assume, and the savings from doing it yourself are significant. According to LawnStarter’s December 2025 cost analysis, DIY pond builders typically spend $550–$2,000 in materials, compared to a national average professional installation cost of $7,400. That’s more than 70% saved — for a weekend’s work.
Some of the links in this article may be affiliate links. If you make a purchase through these links, we may earn a small commission at no extra cost to you. Thank you.
This guide covers every stage from first planning decision to the day you safely add fish — including excavation steps, liner installation, cycling, and planting. Whether you’re building a simple wildlife feature or a serious koi pond, the fundamentals covered here apply to both.
Key Takeaways
- DIY pond building saves 60–80% over professional installation — materials for a mid-size backyard pond typically run $550–$2,000 versus a professional average of $7,400.
- Location and depth are the two decisions that most determine long-term success — getting these right before you dig prevents years of avoidable problems.
- A 45-mil EPDM rubber liner over geotextile underlayment is the most reliable lining system available, carrying a 20-year manufacturer guarantee and a 20–30 year expected lifespan.
- The nitrogen cycle takes 6–8 weeks to establish in a new pond — adding fish before it completes is the leading cause of early fish mortality.
What Should You Know Before You Start Digging a Pond?
The most expensive pond-digging mistakes happen before a single scoop of soil is moved. Fifteen minutes of upfront planning prevents hours of frustrating backfill later. Here’s what to nail down before you pick up a spade.
Decide What the Pond Is For
A wildlife pond designed to attract frogs, newts, and dragonflies has almost nothing in common with a formal koi pond. Wildlife ponds thrive on benign neglect — no pump, no filter, no fish, just native plants and gently sloping margins. Fish ponds are the opposite: they demand depth, filtration, aeration, and consistent water chemistry management. Decide your pond type early and let it drive every subsequent decision.
The UK alone is estimated to have around 3 million garden ponds according to the Wildlife Gardening Forum — the vast majority of them simple, low-cost wildlife features. North America’s broader water features market was valued at $1.784 billion in 2024, according to Wise Guy Reports market data, and is projected to reach $2.772 billion by 2035 — reflecting fast-growing homeowner interest in backyard water features of all types.
Check Permits and Underground Utilities
In the US, many municipalities require permits for ponds deeper than 2 feet or above a certain surface area. Some areas regulate ponds near property lines or watercourses. A quick call to your local planning authority takes ten minutes. More urgently: call 811 (the US national “Call Before You Dig” number) before any excavation to have underground gas, water, electrical, and telecom lines located and marked. In the UK, contact your network operator before digging anywhere near utilities. This step is non-negotiable.
Set a Realistic Budget
According to HomeAdvisor’s April 2025 data, professional pond builds average $3,384 with a typical range of $1,221–$5,669 for small-to-medium residential features. Larger koi ponds regularly exceed $14,500. DIY materials for an equivalent pond run $550–$2,000 — the gap is almost entirely labour cost that you’re contributing yourself. Budget carefully and buy quality where it counts: liner, pump, and filter.
How Do You Choose the Right Location for Your Pond?
Location is the single decision with the longest-lasting consequences. A pond in the wrong spot will fight you for years — filling with leaves, growing rampant algae, losing water to tree roots, or flooding with agricultural runoff after rain. Walk your garden at different times of day before committing to a specific spot.
Sunlight: Aim for Partial Sun
Aquatic plants need 4–6 hours of direct sunlight daily to photosynthesise effectively. But full sun all day — especially in warmer climates — supercharges suspended algae growth and causes water temperature to spike in summer, reducing dissolved oxygen levels. Morning sun with afternoon shade is the practical sweet spot: plants thrive, temperatures stay manageable, and algae stays in check.
Keep Away from Trees
Trees and ponds are poor neighbours. Falling leaves decompose in the water, releasing ammonia that destabilises water chemistry and harms fish. Tree roots have a remarkable ability to find their way through even robust liners over time, causing slow leaks that are very difficult to locate and repair. The Royal Horticultural Society advises positioning garden ponds away from overhanging branches and dense deciduous planting to reduce leaf fall and simplify maintenance. Keep at least 10 feet between your pond and the nearest tree; 15 feet if it’s a substantial deciduous species.
Avoid Low-Lying Drainage Areas
Spots that already collect water after rain funnel fertilisers, herbicides, pet waste, and sediment directly into your pond. This triggers algae blooms and can be acutely harmful to fish. A slightly elevated position — where you control what enters the water rather than having the landscape decide for you — is far preferable to a convenient hollow in the lawn.
Prioritise Visibility and Access
You’ll get far more enjoyment from a pond visible from the house or your main seating area. Position it where you naturally spend time outdoors. Also factor in practical maintenance access: you need to reach every edge comfortably to trim plants, remove debris, and service equipment without trampling surrounding planting.
What Size and Depth Should Your Pond Be?
Size and depth determine how many fish you can keep, how stable the water chemistry will be, and how well the pond survives seasonal extremes. The universal truth in pond keeping is this: bigger is almost always better. Larger water volumes are far more stable — temperature swings less dramatically, oxygen levels stay higher, and the biological filter has more capacity to cope with waste loads.
Recommended Minimum Sizes by Pond Type
| Pond Type | Min. Surface Area | Min. Depth | Approx. Volume |
|---|---|---|---|
| Wildlife / Nature Pond | 54 sq ft (5 sq metres) | 2 ft (60 cm) | ~450 gallons |
| Small Fish Pond (goldfish) | 50 sq ft (8×6 ft) | 2.5 ft | ~900 gallons |
| Standard Koi Pond | 100 sq ft (10×10 ft) | 3–4 ft | ~3,000 gallons |
| Large Feature Pond | 200+ sq ft | 4–6 ft | 6,000+ gallons |
Research published by Bournemouth University in December 2023 found that garden ponds need a minimum surface area of 5 square metres to meaningfully increase invertebrate biodiversity in urban and suburban areas. Smaller ponds still support wildlife, but the ecological benefit ramps up sharply once you exceed that threshold.
Why Depth Matters for Fish
Depth protects fish on two fronts. Shallower than 2.5 feet, a heron or raccoon can wade in comfortably. A deep central zone (3 feet or more) gives fish a refuge that most predators cannot reach. In cold climates, that same depth prevents the pond freezing solid in winter — fish need an unfrozen bottom layer to survive. In hot climates, deeper water stays cooler, keeping dissolved oxygen levels up through summer heat waves.
Build In Shelf Zones
Well-designed ponds include two or three depth zones beyond the main basin. A shallow shelf at 9–12 inches accommodates marginal plants like iris and rushes. A mid-level shelf at 18–24 inches suits deeper marginals and provides a gradual transition for wildlife entering and exiting the water. These shelves also make the pond visually interesting and significantly easier to plant and maintain over time.
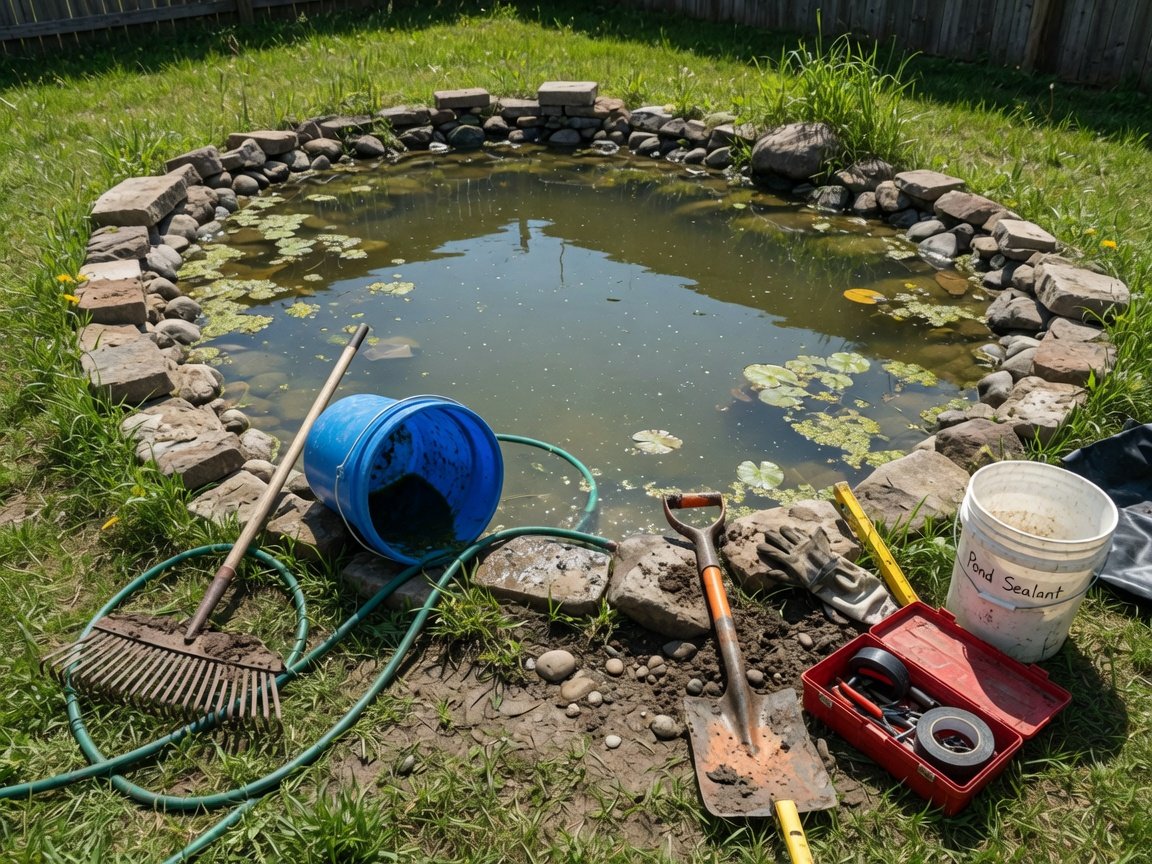
What Tools and Materials Do You Need to Dig a Pond?
Having the right tools assembled before you start prevents frustrating mid-project hardware store runs. Here’s the complete list for a typical small-to-medium backyard pond.
Digging and Excavation Tools
- Flat-bladed spade — essential for clean edge cuts and precise shelf definition
- Mattock or pickaxe — necessary for compacted soil, clay layers, and root networks
- Two wheelbarrows if possible — you’ll move a surprising volume of spoil; one filling while one empties keeps momentum
- Mini-excavator (optional rental) — runs approximately $150–$600 per day depending on machine size; a backhoe rental averages around $340/day according to LawnStarter 2025 data. For any pond over 8×8 feet, the rental fee pays for itself in saved labour
Measuring and Levelling Tools
- Spirit level — the single most important precision tool in pond construction; an unlevel rim exposes liner on one side and risks overflow on the other
- Long straight board or plank — used with the spirit level to check level across the full width and length of the pond
- Measuring tape — verify depth at every stage of excavation
- Garden hose or rope — for marking out the pond shape on the lawn before cutting
Liner and Installation Materials
- Geotextile underlayment — the liner’s cushioning layer against sharp stones and roots; never skip this
- 45-mil EPDM rubber pond liner — the industry gold standard at $0.65–$2.30 per sq ft, with a 20-year manufacturer guarantee and expected 20–30 year lifespan according to Aquascape and Premier Ponds liner data
- Pond pump — sized to turn over the full pond volume at least once per hour
- Biological filter — essential for any pond containing fish
- Natural stone or slate coping — secures and conceals the liner edge; avoids the artificial look of cheap concrete edging
“45-mil EPDM is the liner material we consistently recommend for residential pond builds. It’s flexible enough to conform to any shape, durable enough to withstand root pressure and UV exposure, and comes with manufacturer backing that cheaper alternatives simply don’t offer.”
— Aquascape Inc., Pond Construction Guidance
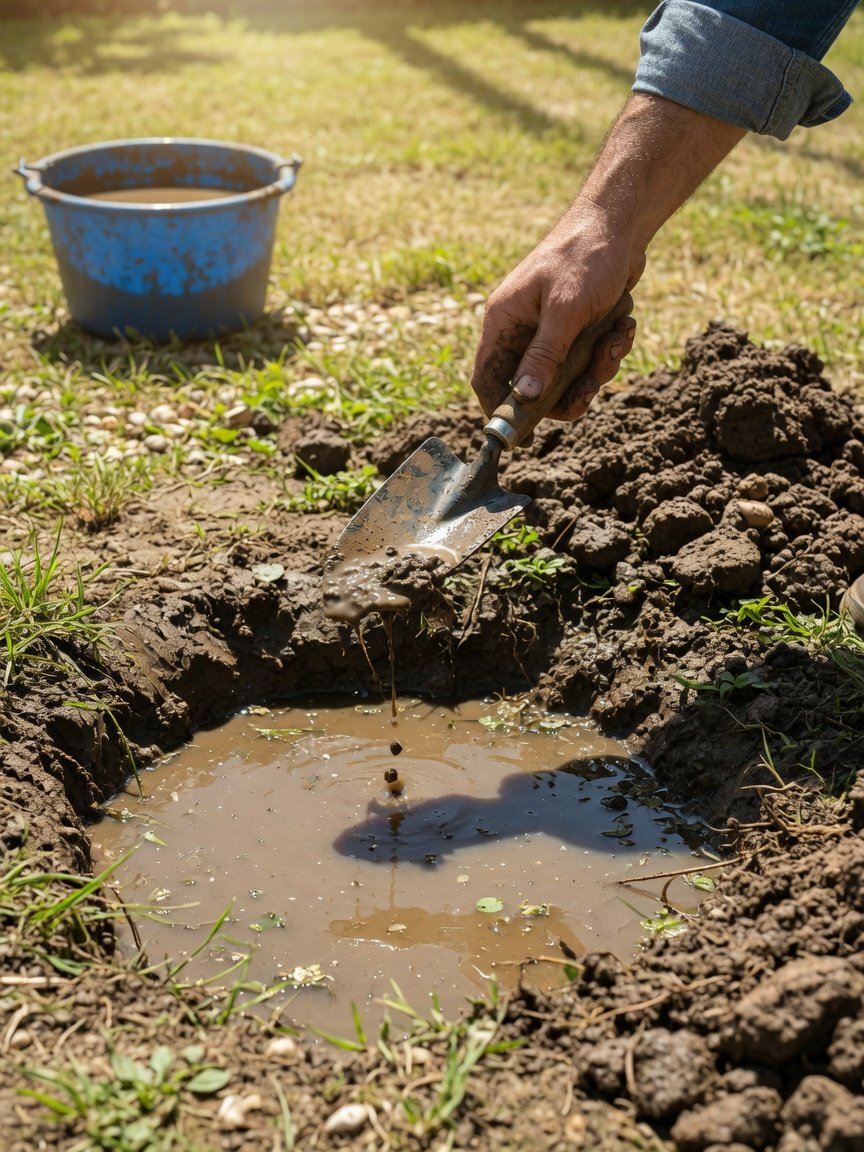
How Do You Mark Out and Excavate a Pond Step by Step?
With planning done and tools assembled, here is the exact excavation sequence. Work methodically — rushing at this stage produces uneven shelves, unlevel edges, and a pond that never quite sits right once filled.
- Mark the outline. Lay a garden hose on the grass in your chosen shape. Organic, curved forms look far more natural than rigid rectangles and are easier to line neatly. Walk around it, view it from multiple angles including through the house window, adjust until satisfied, then transfer the line to the ground with spray paint or a fine trail of sand along the inside of the hose.
- Remove the turf. Slice cleanly just inside your marked line with a sharp spade. Work in manageable sections and stack the turf sod-down elsewhere — it can be composted or used to repair thin patches in the lawn. Keep the cut edge as clean and vertical as possible.
- Dig the top shelf first. Excavate down to 9–12 inches across the entire marked area. This becomes your shallow marginal planting shelf. Stop and check level across the full width and length with your board and spirit level every time you clear a section. Correct discrepancies now — they only get harder to fix once you’re deeper.
- Mark and excavate the second shelf. Leave a ledge 12–18 inches wide around the perimeter of the first shelf, then mark the inner area and excavate down a further 12 inches (reaching 18–24 inches total depth). Check level again before proceeding.
- Dig the main basin. The central zone — typically covering 60–70% of the total pond area — goes down to your target depth: 2–3 feet for wildlife, 3–4 feet for koi. Keep the side walls at a gentle inward slope of about 15–20 degrees from vertical. Completely vertical walls are unstable in most soil types and make liner installation significantly harder.
- Smooth and inspect all surfaces. Use a flat spade to tidy the walls and remove any protruding stones, exposed roots, or hard lumps. Rake the floor flat. Check the overall rim one final time with the spirit level — this is your last easy opportunity to correct any high or low spots before the liner goes in.
- Hand-check every surface. Get into the hole and run your palms over every surface. Even a marble-sized stone under constant hydrostatic pressure will eventually work through a liner. Remove anything that doesn’t feel entirely smooth and flush against the surrounding soil.
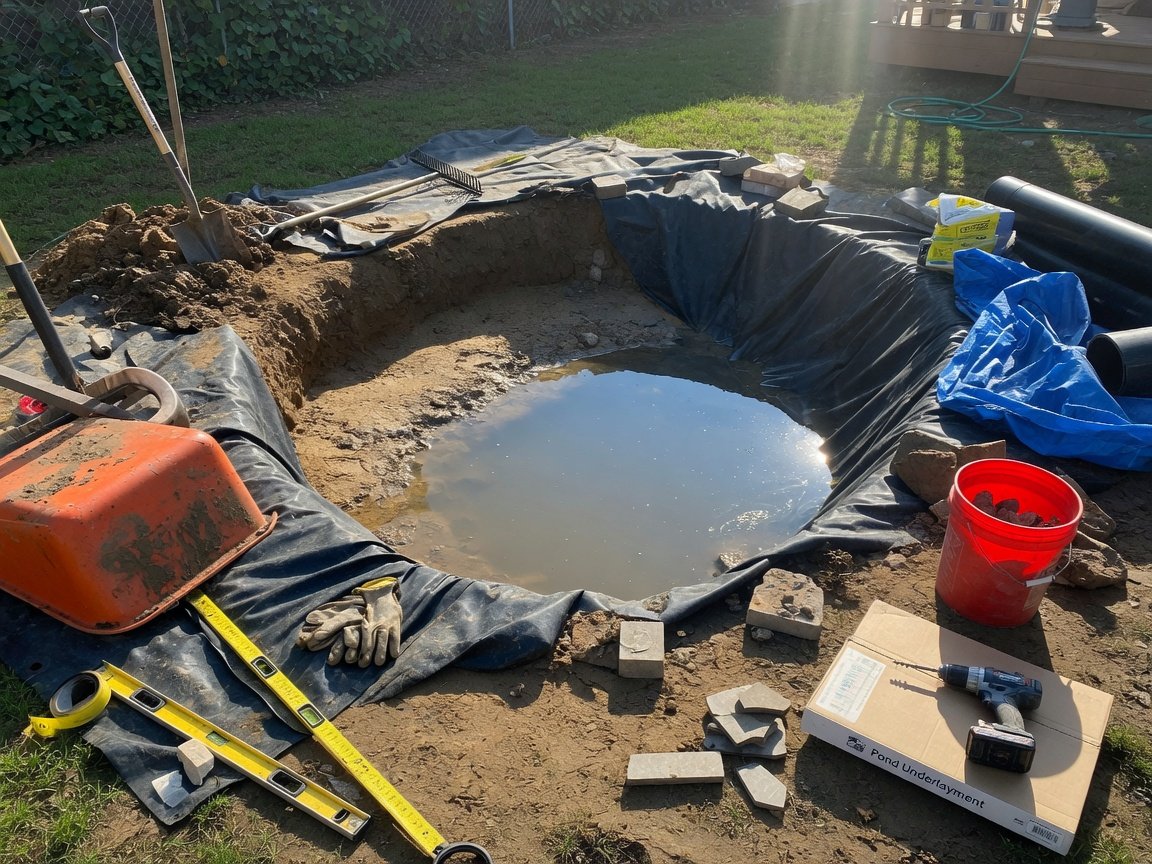
How Do You Install a Pond Liner the Right Way?
Liner installation is where DIY ponds most frequently succeed or fail. Pull the liner too tight and it splits under water weight. Skip the underlayment and a single sharp stone causes a slow, difficult-to-find leak. Take your time here — it is the foundation of every pond year that follows.
How to Calculate Liner Size
Use this straightforward formula:
Liner length = pond length + (2 × maximum depth) + 2 ft overlap allowance
Liner width = pond width + (2 × maximum depth) + 2 ft overlap allowance
For a 10-foot-long, 8-foot-wide pond dug to 3 feet deep: liner length = 10 + 6 + 2 = 18 feet; liner width = 8 + 6 + 2 = 16 feet. Always round up to the next available standard size when ordering. The small additional cost of extra liner is trivial compared to the frustration of running short mid-installation.
Step-by-Step Liner Installation
- Lay the geotextile underlayment first. Drape the fabric into the hole, pressing it into all corners and shelf levels. Let it overhang the rim by at least 12 inches on every side. This cushioning layer is your liner’s first and most important line of defence against stones and root tips.
- Warm the EPDM liner in the sun. On a warm day, EPDM becomes noticeably pliable and easy to work with. Spread it flat near the pond for 20–30 minutes before installation. Cold EPDM is stiff, prone to awkward creasing, and very difficult to fold neatly into curved contours and corners.
- Position the liner centrally over the hole. With a second person helping, carry the liner to the pond and position it as centrally as possible before letting it drape down into the excavation under its own weight.
- Press from the centre outward. Working from the deepest point progressively outward, press the liner into each shelf and contour. Create neat pleats at curves rather than pulling the liner taut — it needs slack to settle fully as the pond fills with water weight.
- Anchor the rim temporarily. Place heavy rocks or bricks around the edge to hold the liner in position. Don’t cut or permanently secure anything at this stage.
- Fill slowly and adjust folds. Begin filling at a gentle rate. As water weight pushes the liner down into contours, periodically adjust folds to distribute them evenly around the perimeter. The liner will continue settling as the pond fills — this is normal and expected.
- Trim and secure the edges permanently. Once three-quarters full, trim excess liner leaving 12 inches of overhang around the full perimeter. Fold this under your coping stones or bury it in a shallow trench dug around the rim. Edging stones then conceal and permanently lock the liner in place.
How Do You Fill and Cycle a New Pond?
A freshly filled pond is not ready for fish. Tap water contains chlorine and chloramines that are acutely toxic to fish and to the beneficial bacteria your biological filter depends on. The nitrogen cycle — the process by which bacteria colonise the filter and render fish waste harmless — takes meaningful time to establish. Rushing it is the single most common cause of new pond fish loss.
Dechlorinate Immediately
Add a liquid dechlorinator immediately after filling if you plan to keep fish. Products based on sodium thiosulfate neutralise free chlorine instantly. Chloramines are different — they don’t off-gas naturally and require a dechlorinator specifically formulated to neutralise them. Check your utility’s annual water quality report to see which treatment they use, and match your product accordingly.
Understand and Support the Nitrogen Cycle
Fish produce ammonia through respiration and waste. Beneficial Nitrosomonas bacteria convert ammonia to nitrite — still toxic. A second bacterial group, Nitrobacter, then converts nitrite to relatively harmless nitrate, which plants absorb and use as fertiliser. According to The Pond Guy’s nitrogen cycle guidance, this full cycle takes 6–8 weeks to establish in a brand-new pond with no pre-seeded filter media.
You can accelerate the process by:
- Adding a commercially available bacterial starter culture directly to the filter on day one
- Seeding the filter with a small amount of mature filter media transferred from an established pond
- Adding a small number of hardy goldfish to provide an ammonia source — but monitor water parameters closely if you do this
- Testing ammonia and nitrite every 2–3 days with a liquid reagent test kit (test strips are significantly less reliable at low concentrations)
The cycle is fully complete when two consecutive tests show 0 ppm ammonia and 0 ppm nitrite. That is your confirmed green light to begin introducing fish gradually.
What Aquatic Plants Should You Add to a New Pond?
Plants are the pond’s natural life support system — they oxygenate the water, absorb the nutrients that would otherwise fuel algae, shade the surface to moderate temperature, and provide essential shelter for fish and visiting wildlife. The Royal Horticultural Society recommends planting across all depth zones, with floating-leaf plants covering roughly a third of the open water surface for optimal balance.
Marginal Plants (Shallow Shelf, 0–12 Inches)
- Blue flag iris (Iris versicolor) — striking purple-blue flowers in early summer, excellent invertebrate habitat
- Pickerelweed (Pontederia cordata) — fast-growing, superb at absorbing dissolved nitrogen and phosphates
- Water mint (Mentha aquatica) — fragrant, pollinator-rich, spreads well along shallow margins without becoming invasive
- Bog bean (Menyanthes trifoliata) — delicate white spring flowers, thrives in the shallowest water at the pond edge
Deep-Water and Floating Plants
- Hardy water lilies (Nymphaea spp.) — the cornerstone of any well-designed pond; shade water, suppress algae, and provide fish with essential spawning cover and shade
- Water hawthorn (Aponogeton distachyos) — vanilla-scented flowers in spring and autumn; complements lilies perfectly in cooler climates
Submerged Oxygenating Plants
- Hornwort (Ceratophyllum demersum) — excellent oxygenator in low-light conditions, also used as spawning habitat by goldfish
- Elodea (Elodea canadensis) — robust, fast-growing oxygenator; plant in weighted bunches on the pond floor at approximately one bunch per 2 square feet of surface area
Research from Bournemouth University confirms that native plant species deliver significantly better biodiversity outcomes than ornamental non-native alternatives — a useful tie-breaker whenever you’re choosing between two otherwise similar options. Prioritise native species where you can source them.
When Can You Safely Add Fish to a New Pond?
The excitement of a freshly filled, planted pond is genuinely difficult to contain — but patience at this specific stage directly determines whether your fish survive the critical first month.
- Wait a minimum of 2 weeks before adding any fish; the recommended target is 6–8 weeks for a fully established biological filter
- Test ammonia and nitrite with a liquid reagent kit every few days — both must consistently read 0 ppm before fish go in
- Start with the hardiest species: common goldfish and shubunkins tolerate marginal water quality during cycling far better than koi
- Introduce fish gradually — start with 20–30% of your target stocking level; add more over several weeks as the filter adjusts to increasing bioload
- Float sealed fish bags on the pond surface for 20–30 minutes before releasing to equalise temperature gradually and reduce osmotic shock
According to The Pond Guy’s stocking guidelines, the safe rule is 1 koi or 2 goldfish per 200 gallons of pond water. Overcrowding is the primary driver of chronic water quality problems, disease outbreaks, and stunted growth in backyard ponds. When in doubt, stock lighter — the water will reward you for it.
What Are the Most Common Pond-Digging Mistakes to Avoid?
Even experienced gardeners make predictable errors on their first pond. Here are the ones most worth knowing about before you start.
- Not checking level often enough. An unlevel rim causes water to crowd to one side, exposing liner on the other and throwing off the aesthetic permanently. Check level at every stage — not just at the end.
- Making it too small. The most universally regretted pond decision, year after year. A pond always looks significantly smaller once it’s filled and planted. Build at least 20–30% larger than your first instinct suggests.
- Skipping the underlayment. EPDM is tough, but it is not impervious to sustained point pressure from a concealed stone. Underlayment is one of the cheapest components in the build and one of the most important.
- Adding fish before the cycle completes. There are no shortcuts in pond biology. An uncycled pond will kill fish. Test, wait for the numbers, then stock.
- Under-planting. Insufficient plant coverage is the root cause of most persistent algae problems. Plants are the cheapest and most effective water quality tool you have — use them generously across all depth zones.
- Placing the pond under trees. Leaf decomposition spikes ammonia. Root intrusion damages liners. Keep a substantial distance from any significant tree.
- Undersizing the pump. A pump rated for half your pond volume will never adequately circulate the water. Match pump output in gallons per hour to your full pond volume — or modestly exceed it.
“The three mistakes that account for the majority of pond failures are: the pond is too small, it’s in the wrong spot, or fish were added before the water was ready. Address all three during the planning stage and you’ll have a pond that essentially maintains itself.”
— The Pond Guy, Pond Construction Best Practices
How Much Does It Cost to Dig a Pond Yourself in 2025?
Here is a realistic materials cost breakdown for a mid-size backyard pond — approximately 10×10 feet and 3 feet deep — based on current verified pricing.
| Item | DIY Cost (approx.) | Notes |
|---|---|---|
| Geotextile underlayment | $50–$100 | Size generously; never omit |
| 45-mil EPDM liner (18×16 ft) | $150–$350 | $0.65–$2.30/sq ft; 20-year guarantee |
| Pond pump | $80–$200 | Sized to full pond volume per hour |
| Biological filter | $100–$250 | Essential for fish ponds |
| Natural stone coping / edging | $100–$300 | Local stone preferred over imported |
| Aquatic plants (starter selection) | $50–$150 | Mix of marginals, deep-water, oxygenators |
| Dechlorinator + bacterial starter | $20–$50 | One-off cost for new pond setup |
| Mini-excavator rental (optional) | $150–$600/day | ~$340/day backhoe rate (LawnStarter, 2025) |
| Total — hand dug | $550–$1,400 | No equipment hire |
| Total — with excavator | $700–$2,000 | Including machine rental day |
Compare these figures with professional installation. LawnStarter’s December 2025 data shows that professional installation of a comparable 8×11 ft pond runs $7,350–$10,000, with a national average across all pond sizes of $7,400. The DIY saving on a single project — typically $5,000–$7,000 — is substantial by any measure. HomeAdvisor’s April 2025 figures place the professional average slightly lower at $3,384, with the range extending to $5,669 for more complex features. Both sources confirm that DIY consistently saves 60–80% of total installed cost.
Frequently Asked Questions About How to Dig a Pond
How deep should a backyard pond be?
For wildlife ponds, the RHS recommends a range of depths from a few inches at the margins up to at least 2 feet (60 cm) in the centre. For goldfish and ornamental fish, 2.5 feet is the practical minimum. Koi ponds should have at least one zone at 3–4 feet deep — both to deter predators and to maintain water temperature stability through summer heat and winter cold. In climates where ponds freeze, that deep zone prevents the pond from freezing solid, which is essential for fish survival.
How long does it take to dig a pond by hand?
A small wildlife pond (approximately 6×6 feet, 2 feet deep) takes an average adult 8–12 hours to dig by hand in typical loamy garden soil. In clay or heavily compacted ground, double that estimate. A 10×10 foot koi pond at 3–4 feet depth is a 2–3 day hand-digging project. Renting a mini-excavator converts that same project into a 3–4 hour job — at $150–$340 per day, the rental cost is often the better value once you account for the physical toll of hand-digging deep, heavy soil.
Do I need a permit to dig a pond in my garden?
In the United States, requirements vary by state and municipality. Many areas require permits for ponds exceeding 2 feet in depth, above a certain surface area, or within specified distances of property lines or watercourses. In the UK, small garden ponds generally fall under permitted development rights, but local conservation area designations, drainage regulations, and title deed covenants may impose additional restrictions. Always check with your local planning authority before breaking ground — the consequences of building without a required permit can include mandatory removal at your own cost.
What is the best pond liner material?
45-mil EPDM rubber is the industry standard for residential pond construction. It costs more upfront than PVC or HDPE alternatives — $0.65–$2.30 per sq ft versus $0.50–$0.75 for PVC and $0.30–$0.70 for HDPE flexible liner — but its 20-year manufacturer guarantee and expected 20–30 year service life make it the most cost-effective choice over the life of the pond. It also remains flexible in cold temperatures where PVC becomes brittle, and conforms to complex shapes and multi-level shelves without cracking or stressing at the folds.
How do I stop my pond going green with algae?
Green water is caused by microscopic suspended algae thriving in nutrient-rich, sunlit water. The most effective long-term control is a combination of approaches: increase floating-leaf plant coverage (water lilies are ideal) to shade more of the water surface; ensure your pump and filter are correctly sized for your full pond volume; reduce fish feeding to only what fish consume in 5 minutes; and perform regular 10–20% partial water changes to dilute accumulated nitrates. A UV clarifier inline with your pump provides rapid results while the plant balance establishes over the first season.
Can I dig a pond without a liner?
Yes — if your soil is genuine heavy clay that holds water naturally. Puddled clay ponds, where clay is worked and compressed to create a watertight seal, have been used for farm and wildlife ponds for centuries and work well in the right conditions. In most garden soils — loam, sandy soil, or even light clay — the pond will drain. For the vast majority of DIY pond builders, a quality liner is the reliable, predictable choice that eliminates the risk of building a pond that simply won’t hold water.
How quickly will wildlife find a new pond?
Faster than most people expect. According to the RHS, pond skaters and diving beetles can arrive within days or weeks of filling — carried on the wind or by birds that visit nearby water. Damselflies and dragonflies typically locate a new pond within the first season. Frogs, toads, and newts usually colonise within the first year, particularly if there are established ponds or wetland areas in the broader neighbourhood. You don’t need to introduce wildlife — create the right habitat, plant it well, and leave it alone.
Your Implementation Timeline: From Idea to Finished Pond
Digging a pond is one of those garden projects where the result is immediately visible and permanently rewarding. From the moment the first scoop of soil comes out, the garden changes in character — and once that first frog settles in, or the first dragonfly hovers over the water on a summer morning, you’ll wonder why you waited as long as you did.
Here’s a practical timeline from first decision to fully stocked pond:
- Week 1 — Plan and check: Decide on pond type, size, and location. Confirm permit requirements with your local planning authority. Call 811 (US) or your network operator (UK) to locate underground utilities. Research liner suppliers.
- Week 2 — Source materials: Order liner, underlayment, pump, and filter. Assemble tools. Book mini-excavator rental if needed for Weekend 1. Source aquatic plants from a specialist aquatic nursery.
- Weekend 1 — Dig and line: Mark out the shape, excavate in stages, hand-check for sharp debris, install underlayment and liner, fill with water, and secure the edging. Your pond is in the ground.
- Week 3 — Set up and plant: Install pump, filter, and any water features. Add dechlorinator and bacterial starter culture. Plant aquatic plants across all depth zones.
- Weeks 4–8 — Cycle and monitor: Test ammonia and nitrite every 2–3 days. Add bacterial culture weekly. Allow the nitrogen cycle to fully establish before adding fish.
- Week 8+ — Stock gradually: Once both ammonia and nitrite read 0 ppm on two consecutive tests, introduce the first fish at 20–30% of target stocking density. Increase over the following weeks as the filter load adjusts.
The pond you build this weekend will still be there in twenty-five years — hosting dragonflies in midsummer, reflecting frost on a January morning, and giving you a quiet reason to step outside that no other garden feature quite replicates. Plan it well, build it once, and the water takes care of the rest.
—