To properly collect pond water for testing, it's important to prepare clean, sterile containers and gather all necessary equipment beforehand. Be sure to label each container with the date, time, and location of the sampling.
Some of the links in this article may be affiliate links. If you make a purchase through these links, we may earn a small commission at no extra cost to you. Thank you.
Prior to taking the water sample, remove any debris on the surface and rinse the containers with water from the pond. Submerge the containers at least six inches below the surface to ensure an accurate sample.
To prevent contamination, use clean tools and seal the containers tightly after collecting the samples. Store the samples in a cool, dark place and deliver them promptly to the lab for testing.
By following these steps carefully, you can ensure reliable results that provide valuable information about the quality of the water.
Choosing the Right Container
When choosing a container for sampling pond water, it's essential to ensure that it's clean and sterile to prevent contamination. A clean and sterile container is crucial for accurate water testing, as any impurities can affect the results.
Opt for a container with a secure lid to avoid spills and maintain the integrity of the sample, ensuring that the water being tested is a true representation of the pond.
Select a container that's suitable for the specific test being conducted, as some tests may require particular materials or sizes for accuracy. Be cautious of reactive materials that could interact with the water and alter its chemical composition, leading to inaccurate results. It's vital to avoid such materials to obtain reliable data.
Label the container with important details like the date, time, and location of the pond to facilitate proper identification of the sample later on. This labeling step is crucial for an organized and dependable testing process.
Preparing for Sampling
Getting ready to sample pond water requires gathering and cleaning all necessary equipment to ensure it's in optimal condition for use. Clean sample containers and testing kits are essential to prevent contamination, which could impact the accuracy of our results. By keeping our sample containers pristine, we can effectively evaluate water quality issues and oxygen levels in the pond.
It's crucial to remove any debris or floating objects from the water's surface to prevent external materials from affecting our samples. Using a clean ladle or cup, we should collect water from various depths in the pond to obtain a comprehensive view of its overall health.
Properly labeling each sample container with the date, time, and specific location in the pond is vital for tracking and comparing samples. This labeling system helps us identify potential problem areas within the pond easily.
To maintain the integrity of our samples before testing, storing them in a cool, dark place or refrigerating them if necessary is key. Keeping the samples in optimal conditions ensures accurate testing results.
Collecting the Water Sample

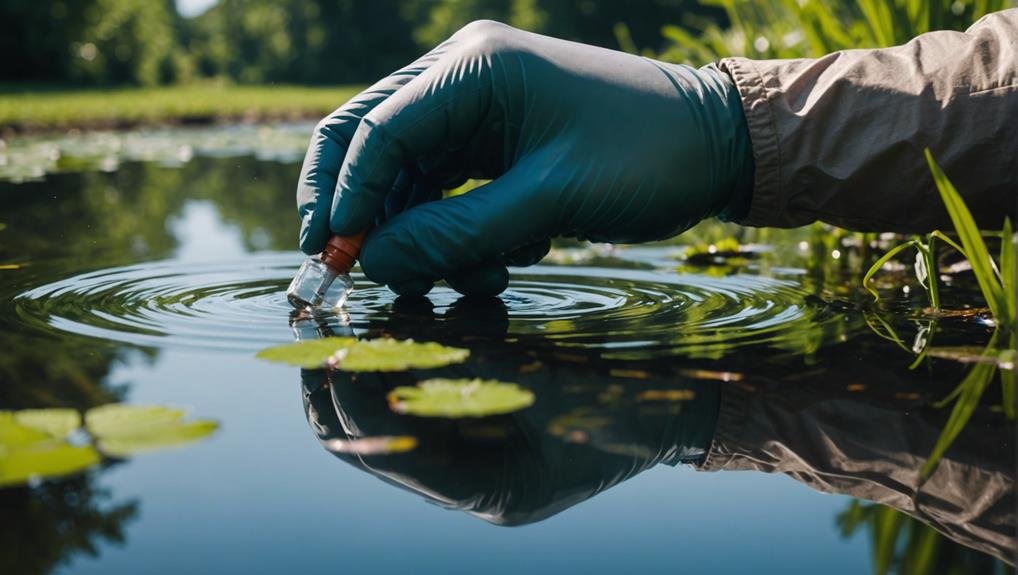
Let's grab our sterilized containers and head over to the pond to start collecting water samples. To ensure we gather accurate data, it's crucial to follow some key steps.
Begin by collecting samples from various locations around the pond. This will give us a comprehensive view of the water quality, including the presence of beneficial bacteria.
When collecting the samples, remember to immerse the container at least 6 inches below the water's surface. This depth ensures that we capture water from different levels, not just the surface, which can contain a variety of microorganisms and nutrients.
Here's a simple guide to follow:
- Sterilized Containers: Always use clean, sterilized containers to prevent contamination.
- Multiple Locations: Collect samples from different spots around the pond for a thorough analysis.
- Adequate Depth: Submerge the container at least 6 inches below the surface water.
- Labeling: Clearly label each sample with the date, time, and location of collection.
Avoiding Contamination
Ensuring the purity of our water samples is essential for accurate test results. To maintain this, it's crucial to rinse the sample bottle three times with fresh pond water before collecting the sample. This process eliminates any lingering substances that may contaminate the sample.
Additionally, it's important to remove any floating leaves or mud from the water to prevent interference with the test results. Clean equipment should always be used, and it's advised to avoid touching the inside of the sample bottle to prevent contamination from our hands, which could alter the oxygen levels in the water and affect the data.
Once the sample is collected, securely sealing the bottle is necessary to prevent any external elements from entering and compromising the sample.
To summarize the steps to avoid contamination:
- Rinse the bottle three times with pond water.
- Remove any debris or particles from the water.
- Use clean tools and refrain from touching the inside of the bottle.
- Securely seal the sample bottle to prevent external contamination.
- Store the sample in a cool place away from sunlight to maintain its integrity.
Sealing the Sample
When securing the lid of the sample container, it's crucial to ensure a tight seal to prevent leaks and contamination. This step is vital for maintaining the integrity of the pond water sample and ensuring accurate test results. By tightly screwing on the lid, we protect the sample from external elements that could interfere with the analysis.
Sealing the sample container properly serves four key purposes. Firstly, it prevents leaks, maintaining the correct sample volume for precise analysis. Secondly, it helps avoid contamination by keeping out dust, debris, and other environmental impurities. Thirdly, a well-sealed container preserves the physical and chemical properties of the pond water, essential for reliable testing.
Lastly, ensuring the sample's integrity through proper sealing directly impacts the accuracy and dependability of the test results. It's important to pay attention to this detail to guarantee the quality and validity of the sample for testing.
Transporting the Sample
Once the pond water sample is securely sealed in the container, it's crucial to transport it promptly and carefully to the laboratory to ensure the accuracy of the test results. Maintaining the integrity of the sample during transportation is essential, especially for drinking water testing, as temperature fluctuations can affect its properties. To preserve the sample, it's recommended to use a sample cooler to keep the temperature stable while in transit.
Delivering the sample to the laboratory within 30 hours of collection is ideal to prevent contamination or degradation that could compromise the test results. It's important to keep the sample container tightly sealed throughout the transportation process to prevent leaks or spills.
To facilitate the transportation process, here are some key steps to follow:
- Seal the sample container tightly to avoid leaks.
- Use a sample cooler to maintain a stable temperature.
- Ensure the sample reaches the laboratory within 30 hours.
- Handle the sample with clean hands and tools to prevent contamination.
- Regularly check the sample cooler for any leaks or spills to avoid any mishaps during transit.
Ensuring Accurate Results
To ensure accurate results when testing pond water samples, it's crucial to use clean, sterile bottles for collection. This helps prevent any contamination that could affect the testing process.
When filling the sample bottle, make sure to fill it to the top to ensure there's enough water for thorough testing of parameters such as carbonate hardness and excess nutrients.
Labeling each sample bottle with the date, time, and location of the pond is essential for tracking and comparing results accurately. Properly storing the water sample in a cool, dark place is also important to maintain its condition until testing.
Following the instructions provided with the test kit is crucial to minimize errors and ensure reliable results. By adhering strictly to the test kit guidelines, you can maximize the accuracy of the data obtained from the water samples.
In summary, remember these key steps for accurate results:
- Use clean, sterile bottles to prevent contamination.
- Fill the sample bottle to the top for thorough testing.
- Label each sample with date, time, and location for accurate tracking.
- Store the water sample in a cool, dark place to maintain its integrity until testing.
Conclusion
To ensure the accuracy and purity of our pond water samples, it's essential to follow a few key steps. Imagine our container as a blank canvas, ready to capture an authentic representation of the pond's overall health.
By preparing diligently, collecting systematically, and preventing any potential contamination, we can guarantee reliable results.
Properly sealing and transporting the sample is the final crucial step. By adhering to these practices, we'll gain a clear understanding of our pond's current state, empowering us to make well-informed decisions regarding its maintenance.