Maintaining ice-free ponds can be achieved through various effective methods. Floating de-icers are equipped with thermally protected motors to circulate water and prevent freezing.
Some of the links in this article may be affiliate links. If you make a purchase through these links, we may earn a small commission at no extra cost to you. Thank you.
Pond air bubblers, powered by air compressors, release streams of bubbles creating circular water movement. De-icer cables, laid out in grids and using electricity to generate heat, offer another reliable option.
Insulating tarp covers with air pockets and solar-powered units provide eco-friendly solutions. Additionally, natural techniques such as incorporating fountains, rocks, and organic matter can help transfer warmth to the pond.
To ensure the success of these de-icing methods, it is vital to implement proper maintenance strategies. Monitoring water quality and addressing erosion issues are crucial steps in keeping ponds ice-free.
By exploring and understanding these approaches thoroughly, pond owners can make informed decisions to effectively maintain their ponds during colder seasons.
Floating De-Icers
During the winter months, floating de-icers are vital for preventing ice formation on ponds. These devices, shaped like disks or compact buoys, work by circulating water to keep the surface from freezing. By strategically placing them in ponds, they help distribute warmer water from the bottom across the entire surface area.
Floating de-icers are equipped with a thermally protected, waterproof motor that powers an impeller to create a gentle current. They're typically powered by electricity, either through a direct connection or solar panels/batteries for remote ponds. Models with built-in thermostats are recommended as they automatically activate when temperatures drop, saving energy and extending the unit's lifespan.
To ensure optimal performance, regular maintenance is key. This includes cleaning intake screens and maintaining proper water levels.
With a floating de-icer in place, ponds can stay ice-free throughout winter, providing a safe environment for aquatic life and a seamless transition into the warmer seasons.
Pond Air Bubblers
Let's delve into how pond air bubblers function – they work by pushing air through a diffuser, which generates bubbles that ascend and keep the water in motion, preventing ice from forming.
To set up bubblers, you need to submerge the diffuser at the deepest part of the pond and connect air lines from an electric or solar air pump on the shore. By ensuring the right size and placement, bubblers can effectively maintain ponds ice-free during the winter months.
Essentially, pond air bubblers play a crucial role in preventing ice from forming on the surface of the water. By continuously circulating the water, they help maintain a healthier environment for aquatic life during the colder seasons.
Additionally, they can also prevent potential damage to the pond liner or structure caused by ice expansion. It's essential to invest in quality bubblers and ensure proper installation to reap the benefits of a well-maintained and ice-free pond throughout winter.
Bubblers Functioning Principle
To prevent freezing and aid in deicing, pond air bubblers operate by releasing a continuous stream of air bubbles from the pond's bottom. This process, known as forced aeration, involves pumping air through a diffuser system submerged in the water. As the bubbles ascend, they generate a circular water movement called the 'doughnut effect,' which mixes the warmer bottom water with the cooler surface water, hindering ice formation.
A regenerative blower or compressor is typically employed to supply the air, which is then dispersed through a network of perforated pipes or diffuser membranes positioned at the pond's base. The number and size of bubblers required vary based on factors such as pond depth, surface area, and desired circulation rate. Proper sizing is crucial for efficient performance and energy conservation.
By maintaining water circulation, bubblers effectively prevent ice formation in ponds, making them suitable for applications like fish farms and recreational areas where open water is essential during winter.
Bubblers Installation Process
When setting up pond air bubblers, it's crucial to plan meticulously and follow specific steps for optimal performance and durability. Start by selecting a suitable location for the air compressor, ensuring it's close to the pond in a dry, well-ventilated area.
Lay out the airline tubing carefully to transport air from the compressor to the diffuser(s) in the pond, burying it to safeguard against potential damage from lawnmowers or other hazards.
After securing the tubing, position the diffuser(s) at the pond's deepest point. The diffuser, a weighted device that releases air into the water, should be anchored to the pond bottom or placed on a weighted base.
Connect the tubing to the compressor and diffuser(s) securely, checking for airtight connections. Adhering to the manufacturer's instructions for installation and maintenance is crucial.
Properly installed pond air bubblers will help prevent ice buildup, maintaining a healthy environment for aquatic life during winter.
Pond De-Icer Cables
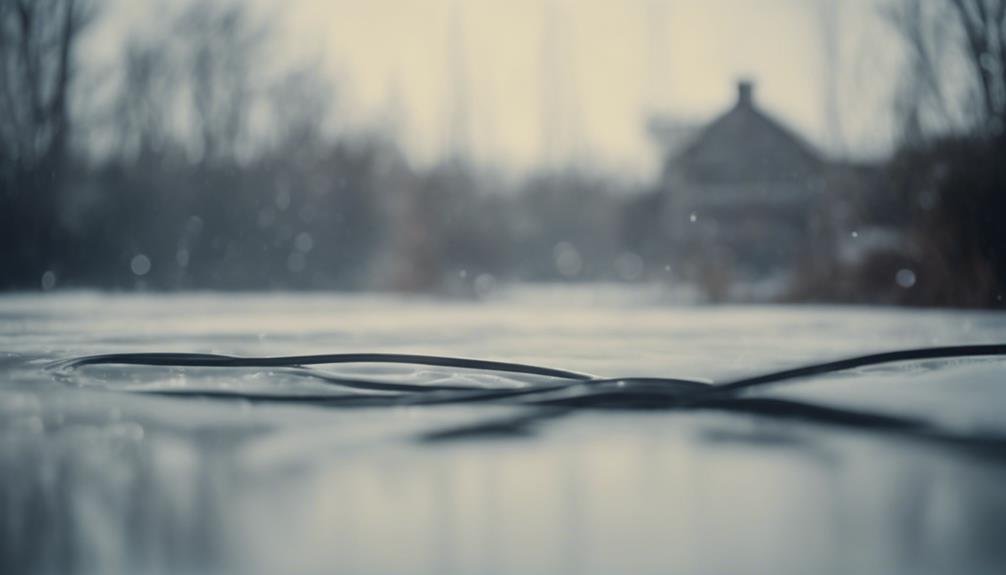
Before installing your de-icer cables in your pond, it's essential to plan out an effective layout to cover the surface efficiently. Consider the power requirements to ensure the electrical system can safely manage the load. Once these aspects are sorted, follow a detailed step-by-step guide for placing the cables accurately to achieve optimal de-icing results.
First, determine the most strategic pattern for laying the cables across the pond's surface. This will ensure even distribution of heat to prevent ice formation effectively. By planning ahead, you can maximize the coverage area and minimize energy consumption.
Next, assess the power needs of your de-icer cables. Make sure that the electrical system can handle the load without any risks of overloading. It's crucial to prioritize safety when dealing with electricity to prevent accidents or damage to the equipment.
Once you have mapped out the layout and confirmed the power compatibility, proceed with the installation process. Follow the manufacturer's instructions carefully to connect the cables correctly and secure them in place. Pay attention to details such as insulation and waterproofing to guarantee long-term functionality.
Cable Installation Process
Installing the de-icer cable system properly is crucial to prevent pond freezeover efficiently. To begin, we'll measure the pond's perimeter and calculate the necessary cable length, ensuring to leave some slack for expansion and contraction with temperature changes.
Next, we'll lay the cable along the pond's edge, securing it with cable clips every few feet. It's essential to submerge the cable about 6-12 inches below the water's surface for optimal heat transfer. Creating a loop at one end to connect the thermostat and power source is necessary.
Once the cable is in place, we'll connect it to a GFCI-protected outlet following the manufacturer's wiring instructions. Adhering to safety guidelines and local electrical codes is critical. The thermostat will activate the system automatically as water temperatures near freezing, preventing ice formation.
Regular inspections will be conducted to check for any cable damage or displacement, ensuring it remains submerged and operational.
With proper installation and maintenance, the de-icer cable system will effectively keep your pond ice-free during the winter months.
Power Requirement Considerations
When installing de-icer cables, it's crucial to consider the power requirements for effective operation. The power needed depends on factors like cable length, water area, and desired temperature. Longer cables and bigger ponds need more power to prevent freezing and maintain proper circulation.
To determine the power needed, it's best to follow the manufacturer's guidelines or consult experts for specific formulas. These formulas consider variables such as water depth, climate, and the desired ice-free area. Following their advice ensures a system that can handle the load safely without causing circuit overloads.
It's also important to consider the power source and its capacity. While some de-icers can be plugged into standard outlets, larger systems may require dedicated circuits or higher voltage inputs. Choosing the right power supply is essential for safe and efficient operation during the winter.
Proper planning and calculations help avoid issues like insufficient heating or excessive energy use.
Placement Pattern Guidance
To optimize the effectiveness of de-icing, it's crucial to strategically position the cables in specific patterns across the pond. The most efficient layout involves creating a grid by placing the cables parallel to each other with even spacing. This grid pattern ensures uniform heat distribution over the entire pond surface.
During installation, it's advisable to start from the center and extend the cables outward in a spiral or circular fashion. Maintaining the right distance between cables is essential to prevent cold spots and avoid energy wastage. The ideal spacing typically ranges between 12 to 18 inches, depending on factors such as pond size, depth, and local climate conditions.
Focusing on the edges of the pond is equally important since these areas are prone to freezing first due to limited water movement. Adjusting the cable loops or spacing near the edges can help prevent ice buildup in these vulnerable zones.
Proper placement plays a vital role in achieving thorough and energy-efficient de-icing coverage across the entire pond.
Tarp Pond Covers
Using tarp pond covers is a cost-effective way to prevent ponds from freezing during cold weather. These tarps are designed to float on the water's surface, creating an insulating air pocket that stops ice formation. They work especially well in regions with mild winters, helping extend the ice-free season and reducing the need for other de-icing methods.
When considering tarp pond covers, there are a few key factors to keep in mind. First, choose a tarp made of UV-resistant and waterproof materials like reinforced polyethylene or polypropylene for durability. Properly anchoring the tarp to the pond's edges is crucial to prevent it from being blown away by wind.
Regular maintenance, such as clearing debris and snow from the tarp, is essential to maintain its insulating properties. For optimal performance, it's recommended to invest in high-quality tarps that are specifically designed for pond coverage. By following these guidelines and selecting the right materials, you can effectively protect your pond from freezing temperatures and enjoy an extended ice-free period.
Solar Pond De-Icers
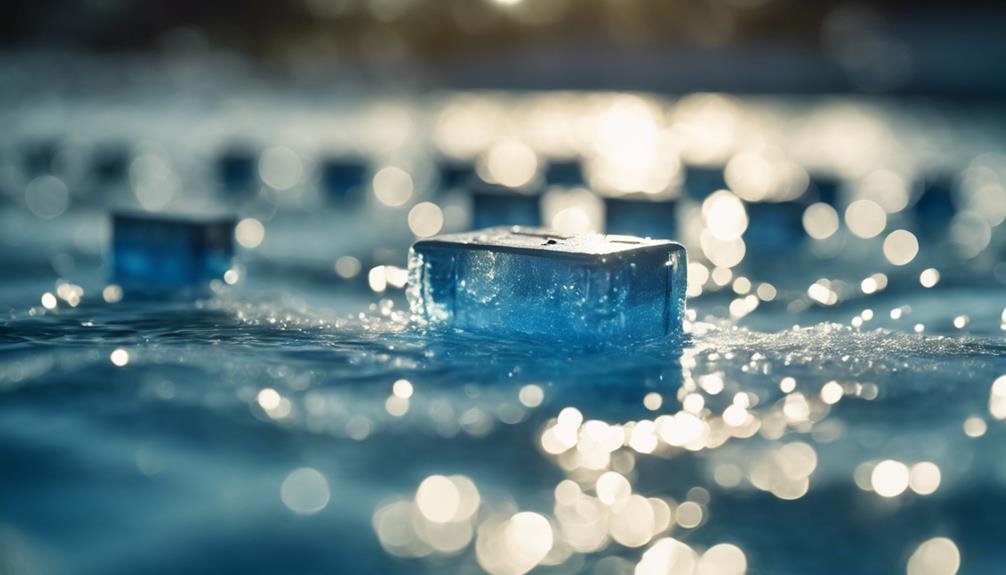
Solar-powered de-icers offer a green alternative to tarp pond covers for preventing ice buildup. These devices float on the water's surface and harness solar energy to generate heat, effectively melting any ice around them. They're easy to set up and require minimal upkeep, making them a convenient choice for pond maintenance.
Ideal for small to medium-sized ponds, solar de-icers work by circulating warmer water from the depths to prevent complete freezing. Their eco-friendly operation, free from electricity or fossil fuels, makes them a sustainable option. In the long run, they can also help save on energy costs compared to traditional de-icing methods.
It's important to note that solar de-icers may not be as effective for larger bodies of water or in extremely cold conditions. In such cases, combining them with other de-icing techniques or exploring different solutions might be necessary.
Nevertheless, for moderately-sized ponds in milder climates, solar de-icers provide a practical and environmentally friendly solution to consider.
Natural Pond De-Icers
To naturally prevent ice formation in ponds, consider using organic methods. One effective way is to install a small fountain or aerator to keep the water flowing, which helps prevent ice from forming on the surface.
Another method is to place dark-colored objects like rocks or submerged logs strategically in the pond. These objects absorb heat from the sun and transfer it to the water, melting any ice buildup.
For a more natural approach, start by collecting fallen leaves, twigs, and other organic matter from around the pond. Bundle these materials together to create a floating mass, then place it in the center of the pond. This bundle will absorb heat from the sun and transfer it to the water below, helping to prevent ice formation.
These methods aren't only eco-friendly but also cost-effective, as they make use of readily available natural resources.
Maintenance Strategies
Maintaining de-iced ponds requires proactive steps to preserve their ecological balance. Regularly monitoring water quality parameters such as dissolved oxygen levels, pH, and nutrient concentrations is crucial. Adjustments may be needed to ensure ideal conditions for aquatic life. It's also important to remove any debris or buildup around the de-icing equipment to keep it working efficiently.
Conducting routine inspections of the pond's liner, banks, and surrounding areas is recommended to catch potential issues early. Promptly addressing erosion, leaks, or structural damage can prevent further complications. Managing vegetation is key, as excessive growth can hinder water flow and disrupt the pond's ecosystem.
Periodically dredging or removing sediment may be necessary to maintain the pond's depth and prevent nutrient buildup. Consulting with experts to create a tailored maintenance plan for our specific de-iced pond is advisable. This approach will help ensure the pond's long-term sustainability and ecological health.
Conclusion
When it comes to keeping our ponds free from ice during the winter months, there are several effective methods available. These range from mechanical solutions like floating de-icers and bubblers to more natural approaches using dark-colored materials.
However, the key to success lies in regular maintenance and proactive strategies tailored to our specific conditions. By following best practices, we can ensure a well-functioning and healthy aquatic ecosystem all year round.